Having a post ready is a good feeling. Remembering to publish it between clients is another matter. Scheduling lets you choose the time in advance, so the finished image and caption aren’t waiting in a folder for you to remember them.
We’ll move one skincare post into Buffer together, checking the publishing method, date and time zone along the way. Some posts publish automatically; others need you to finish the job from a phone reminder.
What do you need before scheduling a skincare post?
Start with one finished image or video, its caption and the date you’d like it to appear. For a carousel, put the slides in order and name them 01, 02 and 03. That makes them easier to check when you upload them.
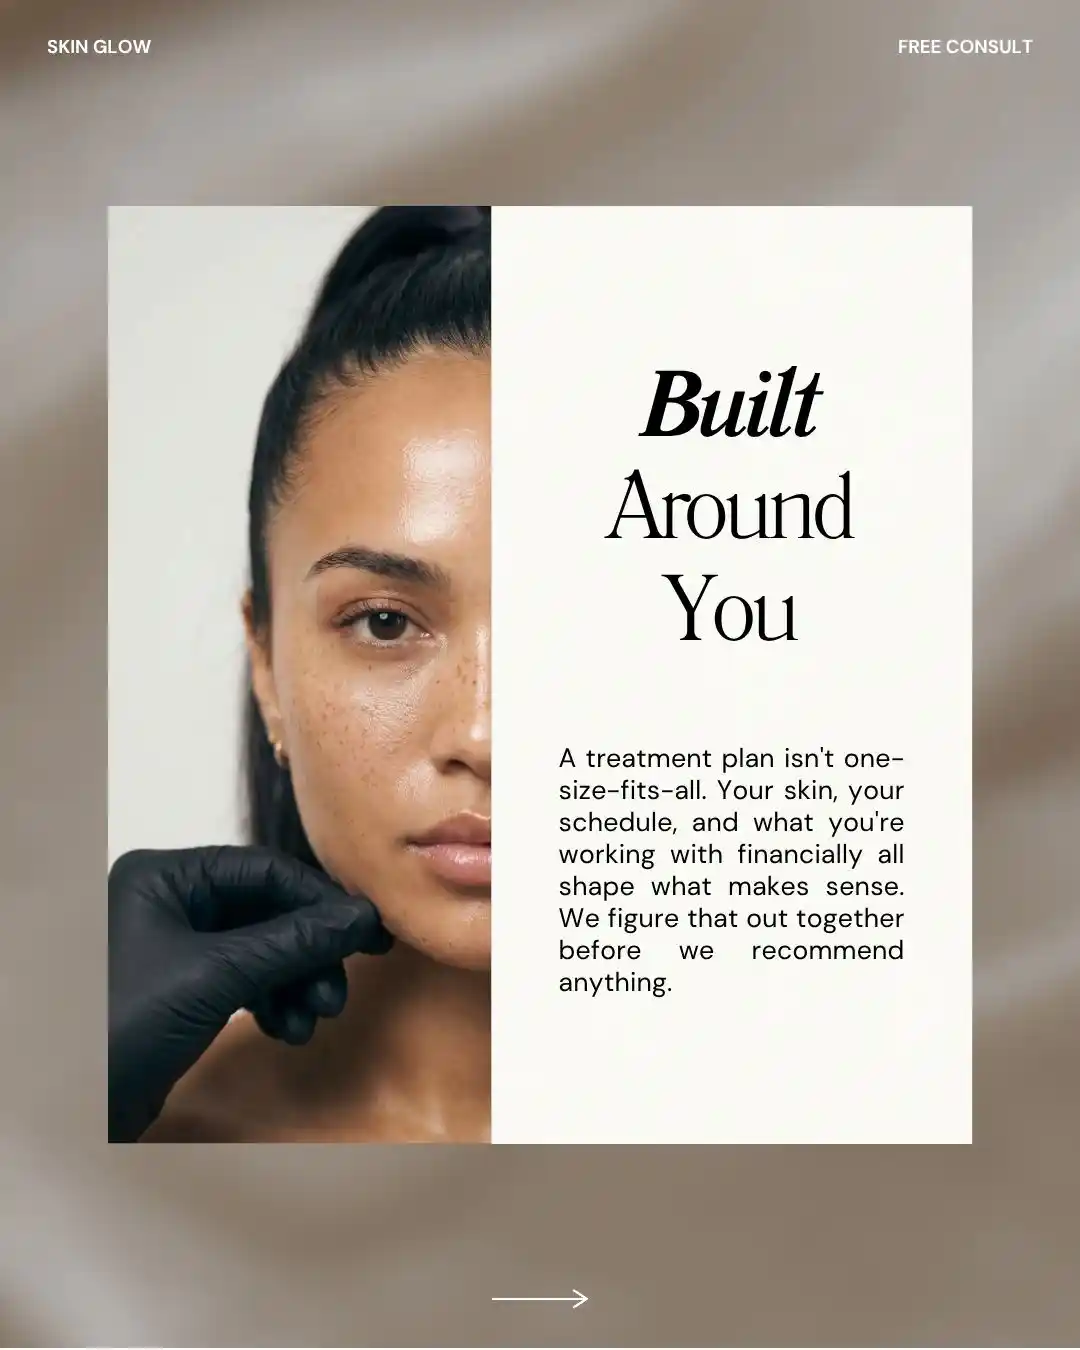
A facial built around you
“Not sure which facial to choose? At Marlow, your first visit starts with a conversation about your skin and your routine. Choose First Visit through the link in our bio to see appointment options.”
Example slot: Wednesday · 10amWe’re using an example caption and a Wednesday 10am slot to demonstrate the process. Change the wording to match your appointment, and use your planned time and audience’s time zone.
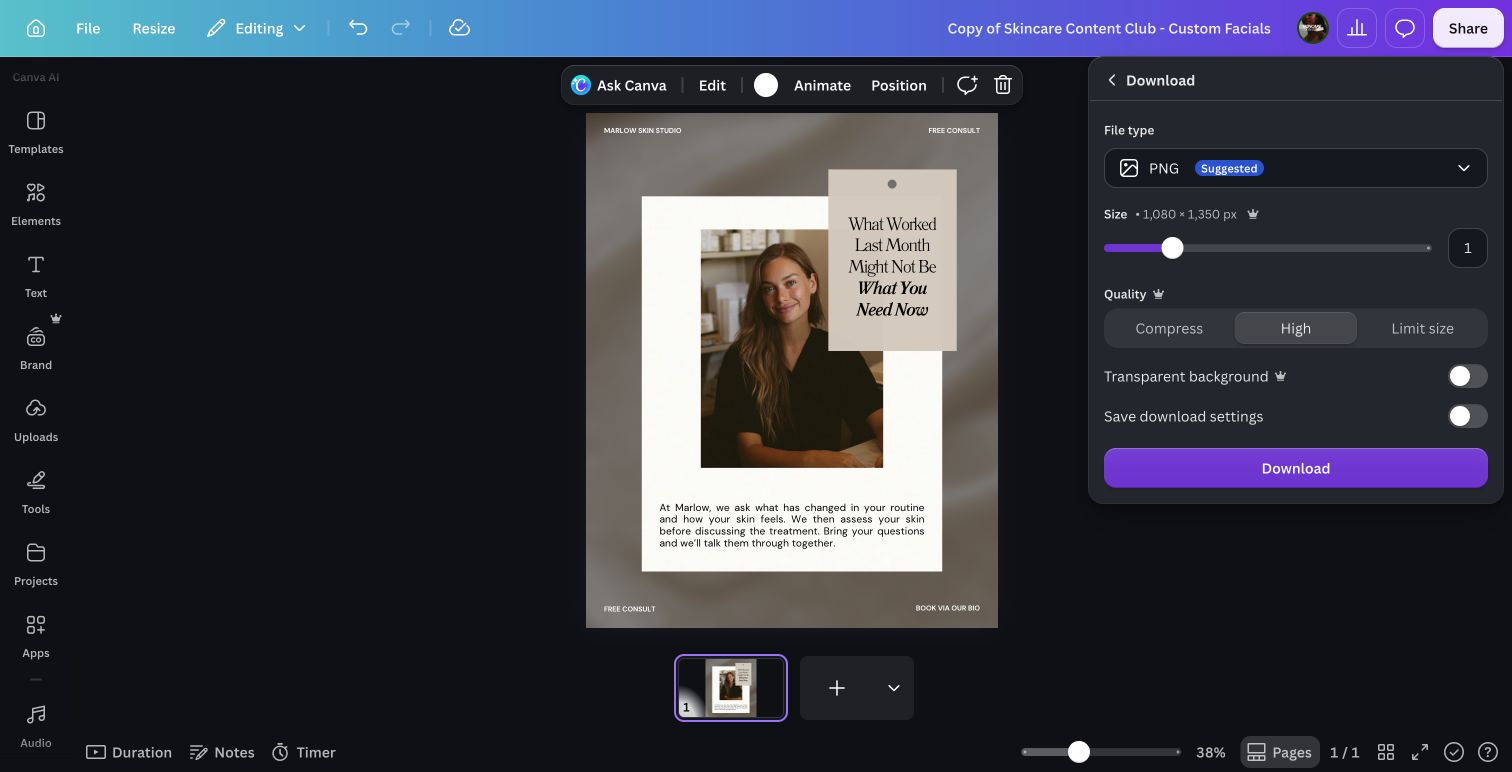
Will your Instagram post publish automatically?
Before adding the rest of your content, check how this first post will publish. We’re using Buffer for the walkthrough, but making this distinction is useful with other schedulers too.
The tool publishes it
Buffer supports automatic publishing for eligible posts on connected Instagram professional accounts. Check that your post is set to Automatic.
You finish it in Instagram
The phone notification tells you it is time to post. You open it and complete the post yourself. Your Buffer mobile notifications need to be enabled.
Personal accounts use notifications. Some extras, such as certain music or Story features, can also require that route. Check Buffer’s current Instagram publishing guide for your account and post type. A reminder being sent does not mean the post is live.
How do you schedule the post in Buffer?
First, connect and select the correct Instagram account. Then work through the steps with one post, so you can get comfortable with the preview and queue before adding your other content.
- Choose New Post and your channel. Check the account name so the post goes to your skincare business.
- Add the exported file and caption. For a carousel, check the slide order. Replace any example business details before continuing.
- Read the preview. Check the image crop, the first caption line and the booking instruction. Open the booking link yourself and make sure it goes to the right place.
- Choose the date and time. Use a specific time or the next available queue slot. Check the time zone displayed in the calendar.
- Schedule, then check the queue. Confirm the right post appears on the right date, with the intended publishing method.
These steps follow Buffer’s scheduling walkthrough, with screenshots. Its calendar guide explains the calendar’s displayed time zone.
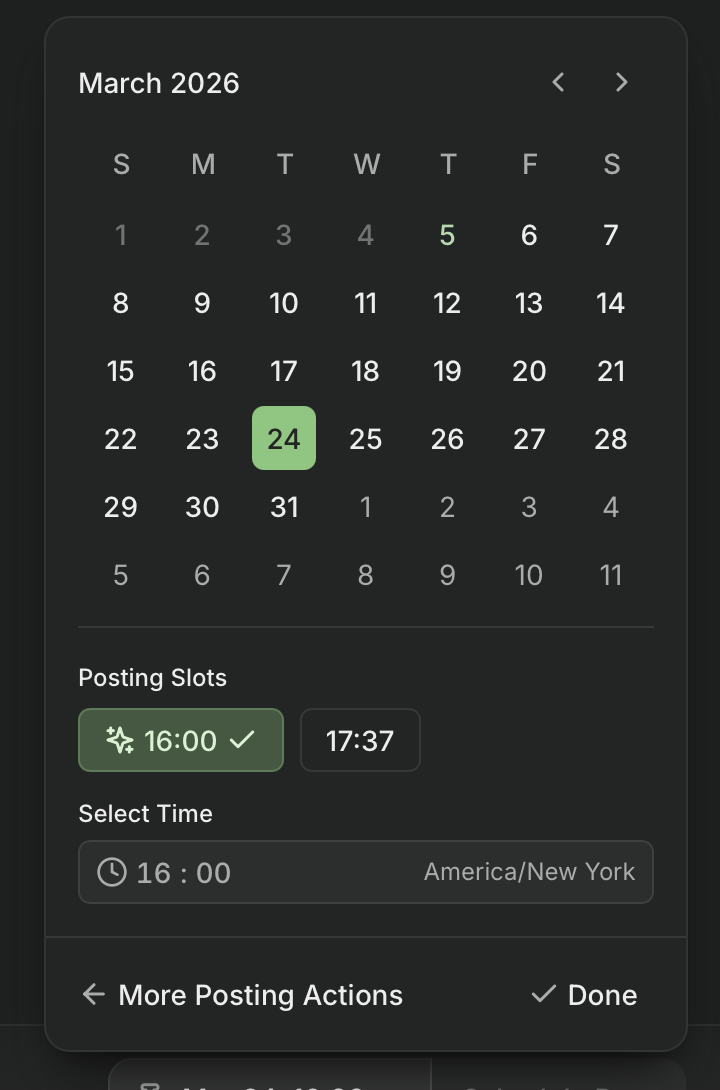
Your date, time and time zone
- Choose the day you want.
- Check the time below the calendar.
- Check the time zone beside it.
Buffer’s own example screen. Use your planned date and audience’s time zone. Source: Buffer Help Center.
What should you check after scheduling?
When that first scheduled time comes around, check the live post. If you chose Notify Me, finish publishing on your phone. If automatic publishing failed, read the error and check what went live before trying again, so you don’t accidentally duplicate it.
- The correct image and caption are live.
- Any appointment dates or availability are still accurate.
- The booking route works on a phone.
- You have time to answer replies.
Once the first post is working as expected, you can use the same process for the rest of the week. Leave a little time to read and answer replies too; scheduling takes care of when the post goes out, while the conversation still needs you.