You’ve seen a change in your client’s skin and want to share the progress clearly. Then you put the photos together and notice the light, angle or distance is different, making it harder to tell what changed.
A repeatable photo setup and a little context can make that comparison easier to understand. We’ll look at what to keep consistent, how a real results post explains the journey and what to check before sharing your own.
How do you take matching before-and-after skincare photos?
Before taking the next photo, open the earlier one as a reference. Try to match the camera, position, distance, background and light, then ask the client to use the same angle and expression. The more repeatable your setup is, the easier this becomes at the next visit.
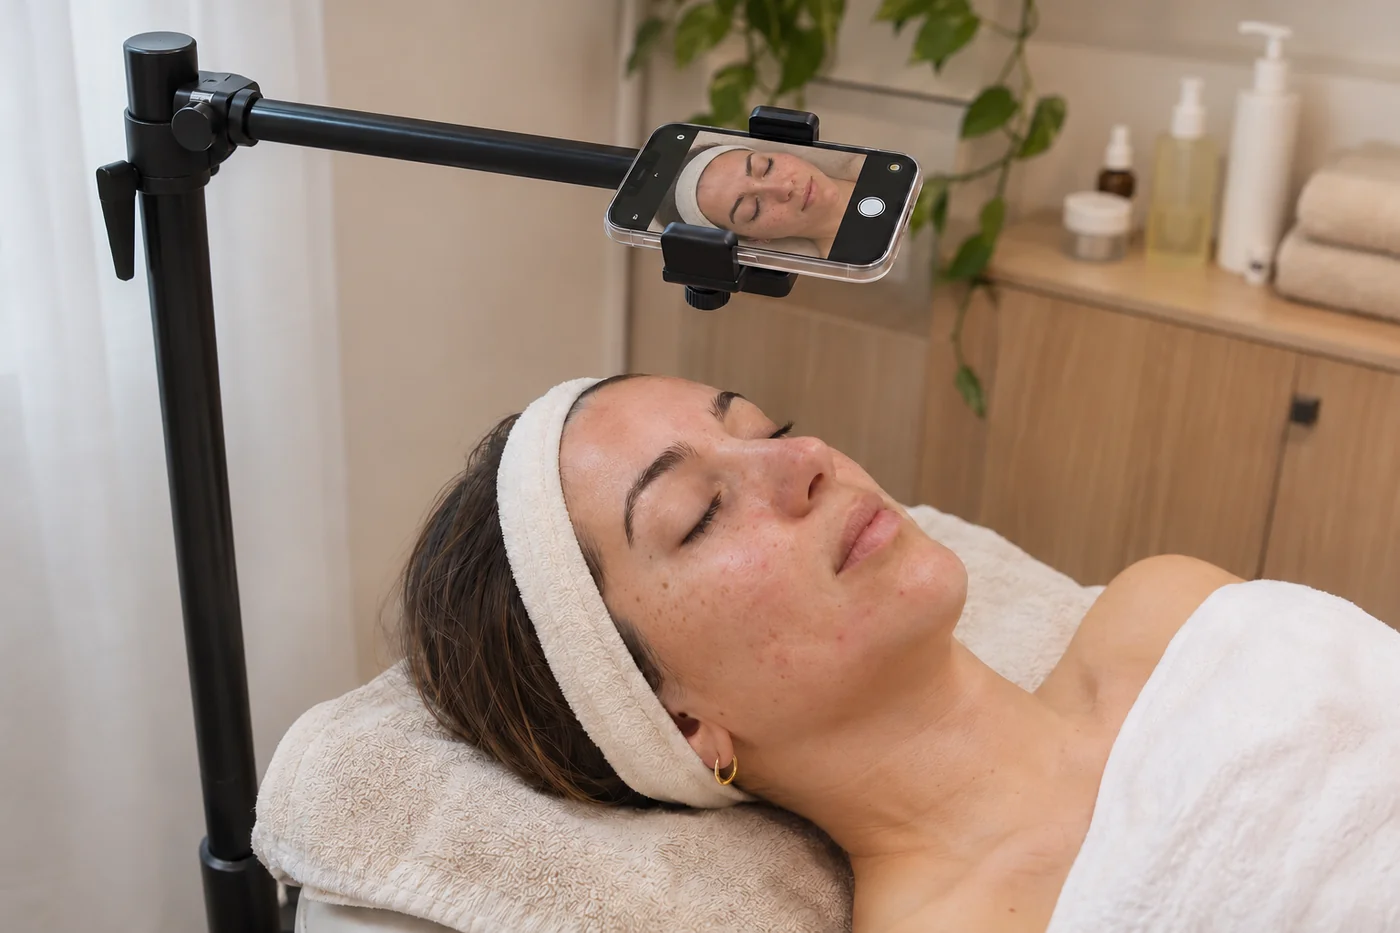
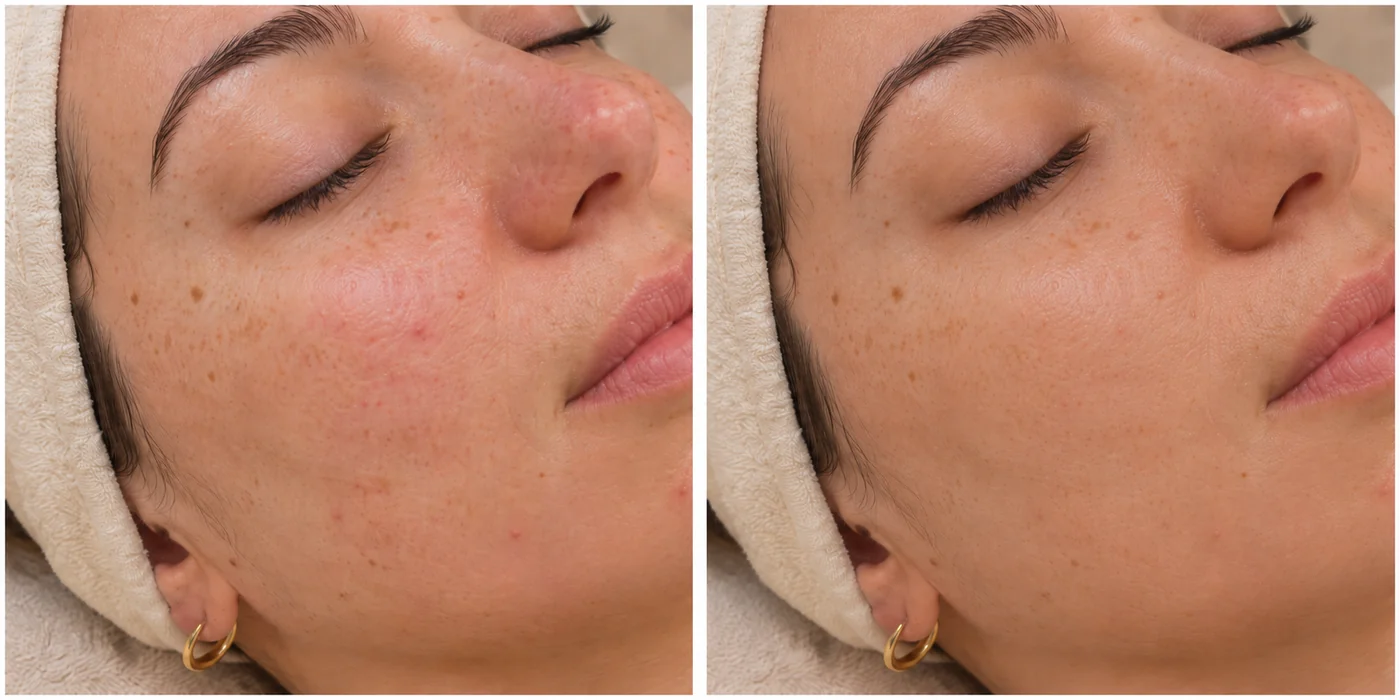
AI-generated examples, not a client result.
- Choose a repeatable spot. Mark where the phone stand goes beside the treatment bed and note the mount height. Keep the head position and light consistent.
- Take the same views. If you take a front view and two side views, repeat those views next time.
- Keep the skin visible. Note differences such as makeup, fresh product, redness or lighting. Do not smooth skin or remove marks in an editor.
Lynton’s clinical photography guide also stresses a consistent setup. The aim is a fair comparison, not making the “after” photograph look better through photography alone.
What can we learn from a real esthetician results post?
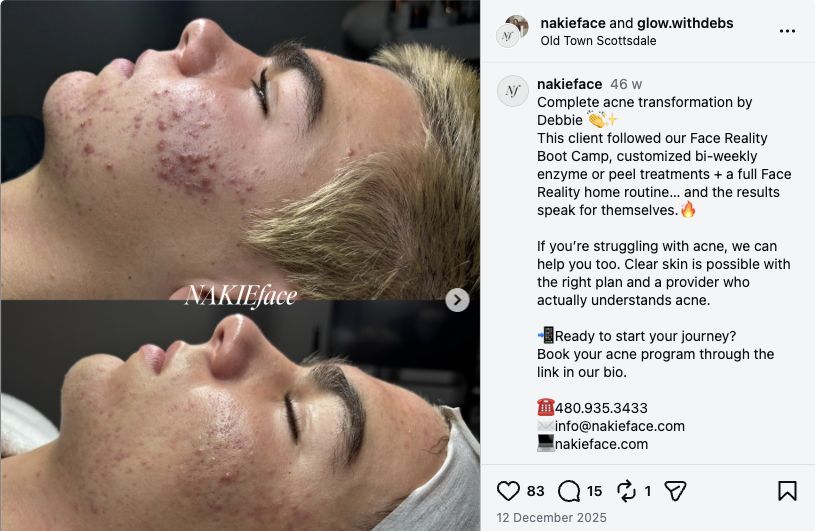
What it explains well
The caption gives us more than a result image. It describes a programme involving clinic visits and a home routine, so the reader isn’t left assuming the change came from one facial.
What we would add
We’d make the overall timeframe easier to find. The caption mentions how often visits happened, but a reader still needs the dates or total time between the photos to understand the journey.
What should your before-and-after caption explain?
Think about the questions someone would ask if you showed them the photos in person: what did the client want help with, what was done, and how long did it take? Then give an interested reader a suitable next step.
Fill the example with details you know and have permission to share. If the client changed several things during that period, include that context rather than crediting the whole change to one product or treatment.
You can keep the caption focused. A few specific details about the treatment and timeline will help someone understand the images without needing the client’s entire history.
Check these four things before sharing a client result
- Permission. Get clear permission for the photographs and where you intend to share them. Agree whether the face or name will be visible. Treatment consent alone is not permission to post.
- Comparison. Check the framing, light and image order. Label before and after so readers do not have to guess.
- Context. Include the time period and relevant treatment or home-care details. Do not promise that everyone will get this result.
- Next step. Invite a consultation or point to the right service information. Let the reader explore whether your service fits them.
If you don’t yet have a comparison you’re comfortable sharing, you still have other ways to show your work. Our guide to posting without client photos includes your room, appointment explanations and common questions.
Keep the earlier image handy for the next appointment, and note the context while it’s fresh. When you’re ready to share, you’ll have a fairer comparison and a clearer account of what happened between the photos.